


Sewing Tips: How to resolve and prevent common thread issues
 Janome Sewing Tips
How to resolve and prevent common thread issues
When it comes to potential issues that we face when using our sewing, our thread (and threading) are commonly at the heart of the issue. The following guide is designed to highlight 5 tips that will assist in identifying and preventing your thread and your machine’s threading from causing stitching and performance issues. Whether you have a Janome Sewing Machine, Overlocker, or Embroidery Machine, by the end of this article, you will be stitching up a storm.
Before we get started, it should be mentioned that while threading a machine (or overlocker) has not changed dramatically over the years, each machine has subtle differences and it is recommended that you refer to your instruction manual to confirm your machine’s threading.
1. Thread Quality
Thread comes in various qualities and can age from time and exposure to UV light. As thread can age, we recommend storing your thread in dark cool space. This not only prevents the wax that holds the thread through from perishing, it also minimises any dust that can become attached to the thread, with could get caught in the machine (we will show you how to clean up any caught fluff and dust in a few paragraphs). Similarly, when your machine is not in use, we recommend covering your machine with a case (Janome or homemade) to keep it save and dust-free.
Not all threads are created equal. Like sewing needles, there are different threads for different purposes. When embroidering, Janome recommends using a bobbinfil thread on your bobbin. This special-purpose thread is designed to be marginally slimmer (so that you can increase the capacity of your bobbin) while still offering the strength of a traditional polyester thread. If you are experiencing a slightly heavier bottom tension when embroidering, ensure that you check the underneath thread and confirm that it is a bobbinfil.
2. Cleaning
Sewing machines and overlocker are capable of creating hundreds of stitches per minute, and with each stitch, thread and dust fibres can be separated from the thread and get caught in the upper and lower tensions. To prevent fibres from building up, it is recommended to give your machine a dusting regularly and cover your machine and threads when not in use. Additionally, it is recommended to clean out the bobbin area (hook race) regularly. Should you have a build-up get into a tension disk, run a piece of crisp paper between your tension disks, which should dislodge the caught fibres.
3. Top Thread Tips:
Spool Caps: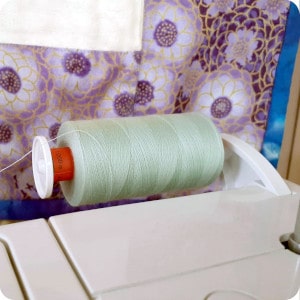
If you are sewing with your thread in a horizontal position, then you will most likely be securing your thread with a spool cap; but did you know that there are different spool caps for different thread reel types? As using the wrong spool cap can lead to the thread pinching against the spool or the side of the machine, Janome has created three different styles of spool caps to cover every situation.
When selecting a spool cap, there are a few rules that will make it easy. For “spooled” thread (like Mettler, Gutermann, etc) the diameter of the spool cap should just cover the diameter of the spool. This generally means that you would use a Small Spool Cap for most 100m & 200m threads on the market and ensures that the thread does not have to be “pulled” on an angle as it comes off the thread. While with centre spooled threads (like Rasant), you can reverse the orientation of the spool cap, thereby supporting the centre of the spool, depending on the size and quality, you could “direct feed” the thread using the special spool cap.
Thread Backspin: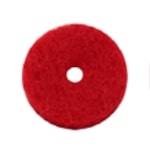
With looser wound thread spools, the spool may spin back on itself when you stop stitching, causing the thread to twist around spool pin. Often occurring on upright threads, this can be easily counteracted with a spool felt and (depending on the orientation of the threads), a spool cap. The Red Spool Felt is designed to sit at the bottom of the spool pin and cushion the spool as it turns. This cushion action minimises the thread spool from vibrating and jumping, which allows the thread to spin back. If you are laying your threads down (horizontally) and are still getting backspin, we recommend using a spool cap to increase the stability of spool.
Damaged Thread guide:
If your thread is getting caught or shredding before it reaches the needle, there is a chance that a plastic surround around one of the thread guides may be damaged. Thread guides can be damaged from incorrect threading or using an external thread stand without the metal plugin thread guide. Check the various thread guides on your machine for any damage. These should look and feel smooth with any rough areas of cracks. If your thread guide is damaged, you may be able to smooth the rough section with fine sandpaper. We also stock replacement thread guides for all Janome and Elna machines.
Tension disks:
On all Janome models, it is important that when you go to thread your machine that you raise the presser foot and the needle bar to their upmost position. By doing so, the tension disks on the will open up allowing the thread to go into the disks. When you finish threading, you can lower your presser foot.
 4. Bobbin Thread Tips:
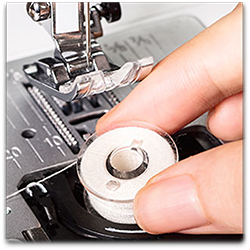
Bobbin Type:
Most Janome Sewing Machines (except for the Straight Stitch Semi Industrial and Multi-Needle Embroidery machines) use a Janome plastic bobbin. Available in standard clear plastic and rubberised “J” bobbin form, these bobbins are crafted to hold 33 metres of thread on them and fit flush with the bobbin case (both top loading and front loading). As other brands have used similar styles (albeit with a slightly different design), using them in your Janome machine can cause jumping and pulling. It is recommended that you only use bobbins that are certified as compatible with Janome. If you require additional bobbins, we have a current special on 50 Bobbin Packs for Janome Machines.
Bobbin Case:
If you are experiencing thread being caught around your bobbin case, or an issue with your lower tension, there is a chance that your bobbin case may need some attention. Most issues can be quickly resolved. Below is the maintenance information for front and top loading bobbin cases:
– Front Loading:
Remove your bobbin case from your machine. Without a bobbin in the bobbin case, visually inspect the tension spring to ensure that there are no thread tails or fluff caught. If you see anything out of order, you can use a fine pair of tweezers to remove any buildup.
From here, inspect the exterior of the bobbin case. If you find rough scratches or burrs (or in the case of people who live near the ocean, rust spots), these can generally be cleaned/polished off. Once clean, we recommend coating the bobbin case in a non-staining silicone spray. This will protect the metal and ensure smooth thread movement.
– Top Loading:
To access the bobbin case, you must first remove your needle plate. Please refer to your instruction manual for guidance. Once the needle plate is off the machine, take the bobbin case out of the machine and check for any burrs or marks that could catch the thread. Depending on the location, these marks may be able to be smoothed out. Should you require a new bobbin case, we have bobbin cases of all Janome model in stock.
While you have access to the hook race/ bobbin case area, check for any fluff or dust that has accumulated and remove it.
Then place your bobbin case back into your machine as per your instruction manual.
5. Bobbin winder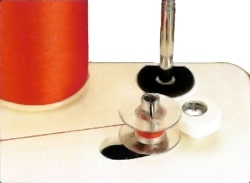
A great bobbin tension starts with a correctly wound bobbin. Like most sewists have experienced in the past, a “spongy” bobbin will not give you a great finished stitch. This “sponginess” is due to winding the bobbin without passing the thread through the tension (sometimes referred to as the bobbin tensioner) before going to the bobbin itself. To prevent this issue from happening to you, confirm that you set up the bobbin winder as per your instruction manual.
Winding Multiple threads onto a single bobbin
While occasionally tempting, it is not recommended to wind multiple threads/colours onto a single bobbin. The reason for this is two-fold. As the previous layers cause the new thread to wind inconsistently, there are minor fluctuations in its tension, as well as increasing the chance that you run out of a bobbin without realising. We recommend beginning each project with a fresh full bobbin of your colour(s) of choice.
 6. Honourable Mention: the Needle/Thread relationship
We would be remiss if we did not mention the critical part of the machine that connects the top thread to the bobbin: the Needle. With hundreds of different styles and sizes of needles available in the market, ensuring that you are using the correct size and type of needle for the fabric and thread is important; as an incorrect needle size or tip can result in the thread breaking, shearing, or splitting. Additionally, as machine needle slowly become blunter and burred as they stitch, it is important that you change your needle every 6 to 8 sewing hours. We recommend using the Janome and Schmetz Needle Range to ensure the best result.
Hopefully, this has helped clear up a few common thread and threading related questions. If you have any enquiries, please feel free to reach out to us: [email protected]