


How to Take Your Measurements (with a Free Print Out Guide)
If you are wanting your next garment to fit you (or the person that you are sewing for) perfectly, a great place to start is collecting all of the measurements. While most patterns do have different sizes included, most people rarely have the same measurements as their “size”. Let’s face it, (and more importantly, embrace) that our bodies can be different and with a little prep-work, any store brought pattern can be adapted to fit perfectly.
But, why should I not use my dress/clothing size? While manufacturers sizes may get you close, it is important to keep in mind that these sizes can vary greatly. One retailer’s size 14 could be 12 or 16 with another retailer. When it comes to sewing your own clothes, knowing your size, unfortunately, doesn’t guarantee that you know your measurements.
The first step in this task is to take and record your measurements in the correct way. Think of this record as a living document. Every pattern you can check that your measurements are accurate and tick them over your list. This way, you can be sure that the next garment you sew, will fit as intended.
This guide will step you through the process of taking your own measurements for dresses, shirts, and skirts.
Preparation
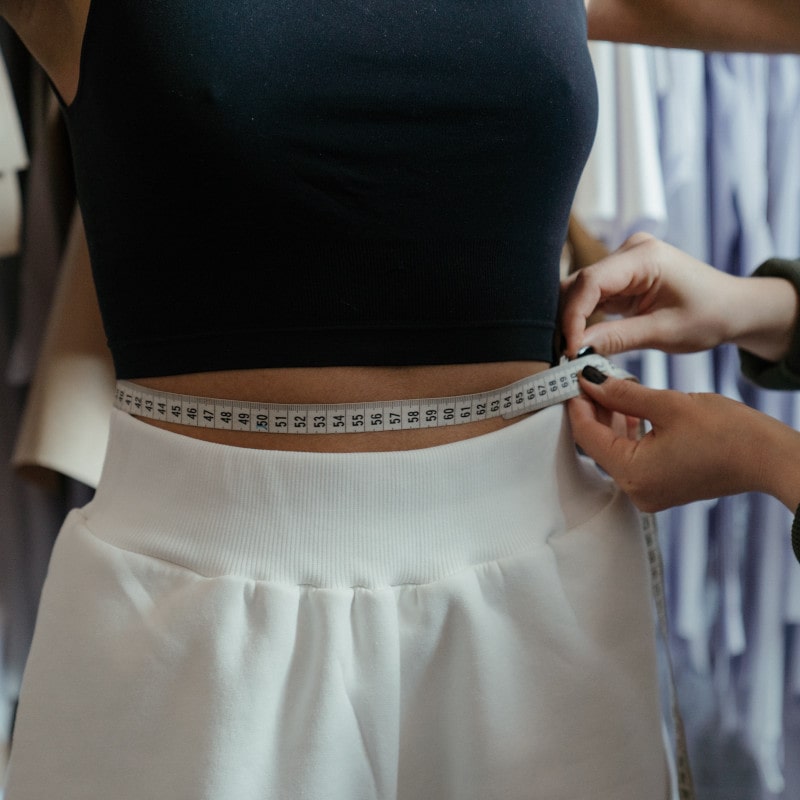
As your measurements are going to be used for your clothing, they should be taken over your usual undergarments. While measuring, it is important to not pull the tape measure too snug; as this will translate to your garment potentially being tighter than you desire. Taking an accurate set of your measurements is not difficult, but does take some care.
Sewing Tip: If possible, ask your relative or friend to assist you. This will make it quicker and easier as you will not have to contort in any way.
When measuring, it is recommended that you use the metric system (CMs). While a standard tape measure will have both metric and imperial, and some of us may have grown up using imperial measurements, you will find that your accuracy, (especially when rounding) is greater using metric measurements.
How to Take my Dressmaking Measurements
The following has been split into two sections, basic measurements and advanced measurements. While you can generally create a dress, skirt, or shirt to fit with your basic measurements (Height, Bust, Waist, and Hips), you can be ensured that the fit is perfect with your advanced measurements (Shoulder Length/Height, Upper Bust, Waist Height & Length, Inseams, and Cuffs to name a few).
Basic Sewing Measurements
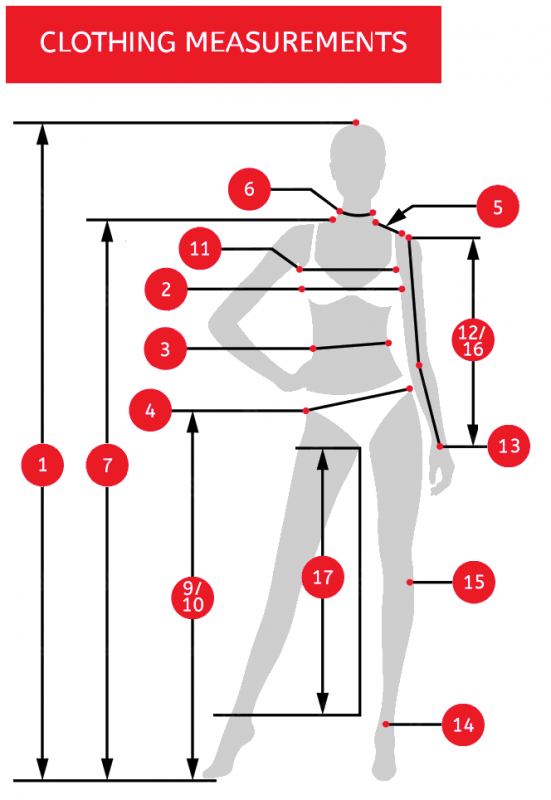
1 – Height: Using a wall, stand up straight (as usual would normally stand) with your back, your head and your heels firmly pressed against the wall. Then either you or your measurer can place a ruler (or a hardcover book) on top of your head (perpendicular to the wall) and then measure the vertical distance from this mark to the floor.
2 – Bust: This measurement is taken from the fullest section of the bust and encompasses the widest part of the back. Ensure that the tape measure is horizontal (straight) as you go around the body.
3 – Waist: To measure your waistline, you must first find your natural waistline. This is the area where your clothes will comfortably sit on your waist.
If you are unsure of the location of your natural waistline, there is an easy trick to find it! Tie a narrow piece of string around the waist (giving the string an extra centimetre so that it can settle easily), and then let go of the string and bend left and right and simulate general movement. This will cause the string to settle into your natural waistline. Then with the area identified, take your measurement.
4 – Hips: Measure your hips where they are the fullest; generally, between 18cm to 23cm from your waist.
Advanced Sewing Measurements (in addition to the basic measurements above)
5 & 6 – Shoulder Length: To measure your shoulder length, you must first find your neck base and your shoulder points and then measure between them. To locate your neck base, gently wrap the tape measure around your settle at the lowest point where the tape measure is still horizontal (it is usually just under the thyroid).
Measuring Tip: Make a note of your neck girth (width). This is a useful measurement for collared shirts.
To locate your shoulder points, lift your arms to shoulder level. By doing so, you will see a dimple form on your shoulder (from shoulder bone) and this is your shoulder point.
7 – Shoulder Height (From Floor): Similar to measuring your height, with your shoulders relaxed, stand against the wall and place your ruler between your shoulder and wall at the shoulder point. Then measure the height.
8 – Waist Height (From Floor): Using a wall, square your hips and place a ruler or hardcover book between your waistline and the wall and make a mark (with washable tailor’s chalk). Then measure the height of this mark from the floor.
9 – Front Waist Length: Measured from the neck base point (which we identified in our Shoulder Length measurements), over the bust and vertically down to the waistline.
10 – Back Waist Length: This measurement starts at the prominent bone at the back of the neck, and traces down along the spine to the waistline. To locate the starting “prominent bone”, bend your head forward and you should feel a bump at the back of your neck.
11 – Upper Bust: Also referred to as the “High Bust” measurement, place the measuring tape horizontally around the body, just under the armpits.
12 – Arm Length: Used for sleeves, this measurement starts at the shoulder point (from measurement 5), and continues down to the start of the wrist.
Measuring Tip: When measuring the arm length, make a note of the “Elbow Point”. This point is useful in patterns with fitted sleeves.
13 – Wrist Cuff: Wrap the tape measure around your wrist at the joint.
14 – Pants Cuff: Wrap the measure around your ankle where the leg joins the foot.
15 – Knee Height: Using the wall, square your hips and place a ruler (or hardcover book) between your mid-knee and the wall and make a mark. Then measure the height of this mark from the floor.
16 – Arm Inseams: Often forgotten, the arm (or sleeve) inseam will ensure clean looking sleeves on your next garment. This is measured from the arm-pit to the inner part of your wrist cuff.
Measuring Tip: The arm inseams can differ slightly between the left and right arm. It is best practice to measure both side to ensure the best fit.
17 – Leg Inseam: Starting at the crotch, measure down to the bottom of the ankle.
That’s it! You can now ensure that the next garment that you create will fit perfectly!
To download our guide, simply click on the link below:
If you have any questions about measurements, or sewing machines, or accessories, please reach out to us and one of our friendly team of sewing experts will happily assist.
Happy Stitching.