No products in the cart.
How to Rolled Hem on a Janome Overlocker?
How to Rolled Hem on a Janome Overlocker?
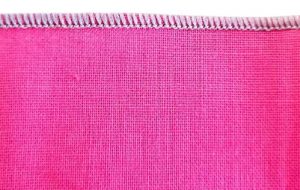
When setting up a rolled hem, you will need:
- A small screwdriver (for your needle screw)
- A Woolly Nylon Thread (in your choice of colour)
- 2 regular overlocking threads (in your choice of colour)
- A pair of tweezers
- Some lengths of fabric for testing
Step 1: Remove the Left Needle
With the handy screwdriver, loosen and remove the left-hand side needle from the overlocker. Once removed, we recommend tightening the needle clamp screw so that it is secure while stitching.
Step 2: Adjust your stitch length
Set the stitch length dial to ®.
Step 3: Set your differential feed to 1.0
While differential feed will be slightly adjusted to match the stretch of the fabric, it is a good idea to start in the neutral 1.0 position. Typically there are two reasons that the differential feed is adjusted: high stretch material and for decorative rolled hems (such as lettuce rolled hems and picot edging). We recommend once the overlocker is set for rolled hemming, grab a scrap piece of material and test and adjust as needed.
Step 4: Move your Stitch forming finger to ®
To move the stitch forming finger, press against the upper blade release spring (this might be tight for the first few times) and with the other hand, slide the stitch forming finger towards the ® position. Once in the ® position, release the upper blade with the cutting edge in the up position.
Step 5: Adjust your tensions
Depending on your model, you will have to either adjust your tension dials or switch the tension switch to R.H. (rolled hem mode). To find the best tensions for your overlocker, please refer to the instruction manual. Like setting the differential feed, there are some fabrics that you will adjust the tensions slightly from the recommended settings. We recommend testing the stitch on a scrap piece of material to ensure stitching perfection.
But wait, what about the thread?
That is a great question, when changing your threads over for rolled hemming, the following thread combinations will give you a perfect overlocker rolled hem.
Right-Hand Needle Thread
It is generally recommended to use a polyester (or polycotton) thread on the needle when rolled hemming. As this thread is mostly covered by the looper threads, it can be a colour match or a toned match (I use a black Rasant thread for most dark colours and an off-white for very light colours (and with everything in between, I like to match the thread to the fabric).
Upper Looper Thread
The main thread that will show on the finished hem is the upper looper. For this reason, it is recommended to use a woolly nylon on this looper. A soft and fibrous thread, woolly nylon fills out the gaps between stitches allowing for a beautiful continuous seam.
Lower Looper Thread
While this looper can also be threaded with a woolly nylon (and this can produce a beautiful rolled hem on medium weight fabrics), typically, you can use a general polyester thread.
To change the overlocking thread over to the new colours (or woolly nylons) quickly, we recommend trying the “tie-on” method. This method prevents the need to completely rethread the overlocker.
Now that the overlocker is set for a rolled hem, it is time to enjoy this fantastic stitch.
Top tips for a great rolled hem:
- Stitch a chain for 4~5cm and pull the chain to the back lightly before starting on the material. Repeat this at the end of the row of stitching. This will ensure that the beginning and end stitches have the same tension as the middle.
- If hemming in the round (on a circular shirt or skirt hem), stitch the rolled hem before constructing the side seams. This will prevent the chance for an uneven hem near the start/end of the stitching and will look neat and professional.
- When possible, stitch on the fabric’s bias. This will allow the fabric to easily curl under.
- When in doubt, consult the instruction manual.


